
GA4 changed the flow. You don’t “add tracking” and call it a day. You set up an Account → Property → Data Stream → Tag → Verify chain and make sure each link is clean. This guide is for website owners and marketers who need a fast, reliable setup without wading through jargon.
You’ll learn how to set up Google Analytics account, create a GA4 property, add a Web data stream, install the tag via GTM or gtag, and confirm data in Realtime/DebugView. We’ll also cover quick fixes for “no data,” duplicate tags, and wrong IDs. Clean setup first. Fancy reports later.
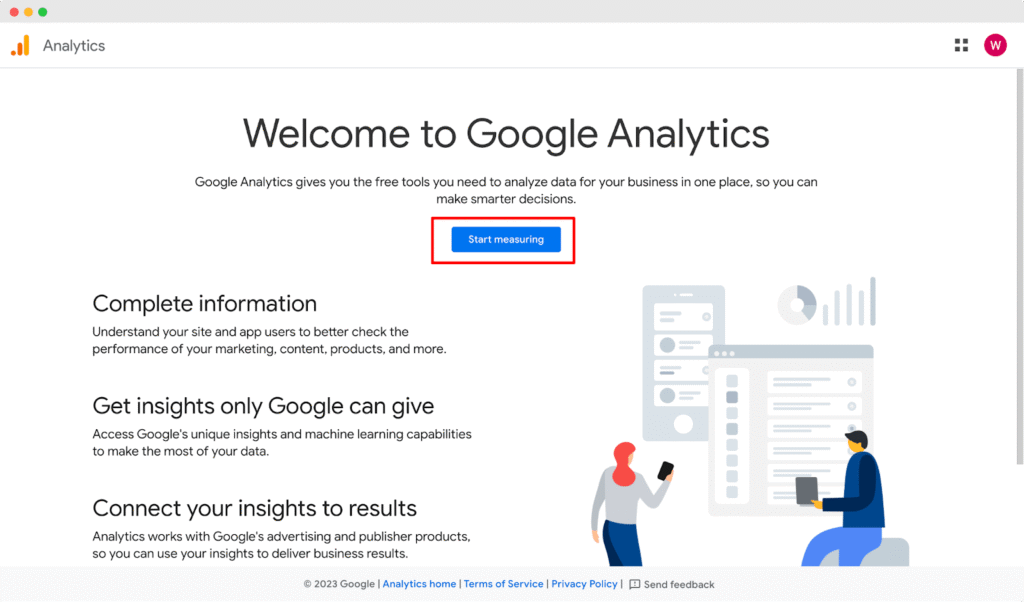
Create a Google Analytics account.
An account is the top-level container; a property holds the reports. That’s it.
To create Google Analytics account, go to analytics.google.com and click Start measuring.
Name the Google Analytics account after the legal business entity, not a website. You can add properties for sites/apps inside it later. Keep data-sharing toggles intentional: enable benchmarking if you want industry context; disable anything your privacy policy can’t support.
Naming hygiene matters. Use a stable, organization-level name (“Acme Inc”), not campaign names (“Q4 Ads”). Avoid stuffing markets or brands into the account name; you’ll handle that at the property layer.
Multi-brand or multi-org? Keep them separate.
One account per legal/operational entity. Mixing brands in one account complicates permissions, exports, and audits. If you manage clients, never place client properties inside your own account; use theirs, with you as an admin.
Deliverable: you end with a live account, cleanly named, with sane data-sharing settings, and you understand that properties belong under the account, not mixed at the top.
Create a GA4 property.
A property is your reporting container, where events, users, and conversions live. In GA4 setup, you’ll add one property per site/app (or per region/brand when data must stay separate).
Open Admin → Create Property. Fill the Property Setup form carefully:
- Property name: Use a stable label, e.g., “Acme US – Web.”
- Reporting time zone: Match the business’s finance/ops timezone (impacts day boundaries).
- Currency: Match billing/reporting currency.
- Business details/Objectives: Set honestly to pre-load helpful reports (you can edit later).
This is Google Analytics 4 setup only; Universal Analytics is sunset. If you already have an account and need another container, choose Admin → Create → Property (“ga4 create new property” flow).
When to create multiple properties:
- Legal or privacy separation (EU vs. US).
- Distinct brands with different stakeholders.
- Different platforms, when data must not mix (rare; streams usually suffice).
When not to: minor country folders or marketing campaigns, keep those within one property via filters/audiences.
If you’re asking how to set up GA4 correctly, the answer is scoping: one clean property per entity/market that truly needs isolation.
Deliverable: a GA4 property with the correct name, timezone, and currency, ready to receive a Web data stream.
Add a Web data stream.
This is the pipeline from your site to GA4. In Admin → Property → Data streams → Web, enter your site URL and a clear stream name (Web – domain.com). This is the cleanest way to set up Google Analytics for a website without mixing sources.
Enable Enhanced Measurement (you can fine-tune later). What the toggles do:
- Page views: auto-captures page loads and SPA route changes.
- Scrolls: fires at ~90% scroll depth by default.
- Outbound clicks: links to external domains.
- Site search: reads query params like ?s= or ?q= (set your parameter).
- Video engagement: YouTube embeds (start, progress, complete).
- File downloads: clicks to common file types (PDF, CSV, etc.).
- Form interactions (if available): basic engagement signals.
Save and note the Measurement ID (format G-XXXXXXX). You’ll need it for gtag or GTM.
Privacy note: if you operate in consented regions, plan Consent Mode now so page_view and other events respect user choices. We’ll link to privacy/integrations in the later section, but flag it early.
That’s how to set up Google Analytics on a website at the stream level: correct URL, sensible naming, smart toggles on, Measurement ID ready for tagging.
Install the tag (GTM or gtag.js)
Pick one path and stick to it, double-tagging corrupts data. This is the moment in your Google Analytics setup where most mistakes happen.
Option A: Google Tag Manager (recommended for teams)
- Create a GA4 Configuration tag with your Measurement ID. Trigger: All Pages.
- Add optional GA4 Event tags (e.g., generate_lead, view_search_results) only if you need custom events now.
- Submit → Preview (Tag Assistant) → Publish.
- Verify in Realtime/DebugView.
– Why GTM? Versioning, environments, and fewer theme edits when you set up Google Analytics across multiple templates.
Option B: gtag.js (fastest code-only install)
- Paste the provided gtag snippet before </head> on your global layout so it loads on every page.
- Avoid partial installs (e.g., home only).
- Confirm no other GA tags exist.
Common pitfalls
- Page builders/CMS plugins silently inject GA tags, disable them if you deploy GTM/gtag manually.
- Two Measurement IDs firing on the same page = inflated sessions/events.
- Wrong ID (typo or staging ID) = empty Realtime.
Deliverable: one clean setup Google Analytics path (GTM or gtag), verified in Realtime/DebugView, with no duplicate tags detected.
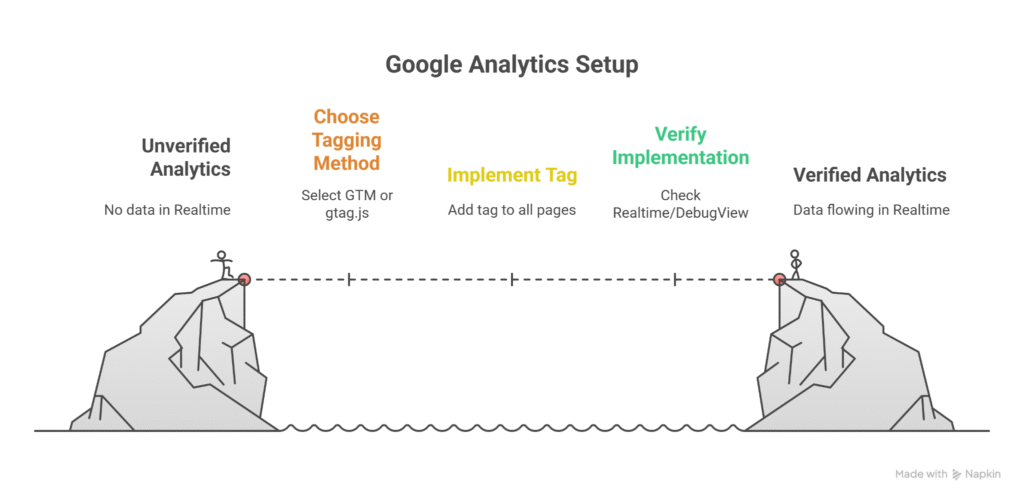
Verify data & basic reports.
Open Realtime. Do a self-visit: load a page, click a few links, trigger a file download if you have one. You should see your active user, page_view firing, and location/device roughly matching you. Next, open DebugView (enable Tag Assistant preview) to watch the event stream in order: page_view, scroll, click, and any enhanced-measurement events.
Set one conversion now. Easiest win: a thank-you URL or a key action (e.g., generate_lead). Admin → Events → mark as Conversion (or create a custom event from parameters if needed). This gets your Google Analytics set up beyond vanity traffic.
Reality check: standard reports respect your property time zone, so yesterday/today numbers can lag; Realtime is immediate. If Realtime is empty, recheck Measurement ID, ad-blockers/consent, and duplicate tags.
Minimum proof before moving on:
- Realtime shows your session
- DebugView lists core events in sequence
- One conversion toggled on and test-fired
That’s how to set up Google Analytics for a website with confidence: data verified, a conversion flagged, and the pipeline working.
Troubleshooting (no data, duplicates, wrong property)
Start with the basics, most issues are simple.
No data
- Measurement ID mismatch: Compare the ID on-page (View Source or Tag Assistant) with GA4 Admin → Data Streams.
- Consent/ad blockers: In consented regions, fire tags after consent. Test with Tag Assistant; try a clean browser profile.
- Script placement: gtag/ GTM injected after </body> or blocked by CSP. Move to <head>; relax CSP as needed.
- JavaScript errors: Console errors can halt tags, fix breaking scripts first.
Duplicates
- Two tags fire (GTM and theme/plugin gtag). Remove one. In GTM, check the Tags firing summary; confirm only one GA4 Configuration tag.
Wrong property
- Traffic showing elsewhere? Verify the on-page ID vs. GA4 property ID; fix typos or staging IDs.
If you’re searching “Google Analytics how to set up” fixes, run this order: ID → consent/blockers → placement/CSP → JS errors → duplicates.
Deliverable: single tag path, correct ID, Realtime + DebugView events flowing.
Quick reporting & QA
Build a tiny proof pack you can share in one message. First, grab a Realtime screenshot with your active session visible. Then open DebugView and capture the last few events (page_view, scroll, click). Next, export a 7-day overview (Users, Sessions, Views) from the standard reports. If you migrated, add a one-line before/after note (e.g., “UA last week vs. GA4 this week: tracking parity confirmed for page_view”).
In Trends, watch Users and Sessions for obvious cliffs/spikes over the next few days. Finally, create Google Analytics report basics for stakeholders: one page with Realtime shot, event list, 7-day table, and your notes.
Next steps: rename noisy events, define conversions, and link Google Ads and Search Console when you’re ready.
Deliverable: a lightweight, shareable checkpoint.
Privacy & integrations
GA4 ships with IP anonymization by default, but consent still matters. If you use a banner, implement Consent Mode so tags respect user choices; expect reduced modeling when consent is denied. Document what you collect, why, and where it’s stored as part of your Google Analytics setup notes.
Link these next (Admin → Product links):
- Google Ads , import conversions, build audiences, see ad-to-site impact.
- Search Console , align queries/landing pages with engagement.
- Tag Manager , manage GA4 tags and events without touching code.
Keep access scoped: least privilege for editors, admin only for owners. After you set up a Google Analytics account and connect products, recheck Realtime and conversions once to ensure consent and links didn’t break tagging.
Deliverable: compliant tracking with Ads/GSC/GTM connected and verified.
To Sum Up
You’ve set the foundations: Account → Property → Web data stream → Tag → Verify.
Keep it simple, check Realtime after any change, and review reports weekly for the first month. If numbers look off, hit the troubleshooting list; if you operate in consented regions, confirm privacy settings and links.
This is how to set up Google Analytics without drama, clean signals now, better decisions next. Ship it, then iterate.
Frequently Asked Questions
How to set up Google Analytics?
GA4 setup done, but Realtime is empty, why?
Why are page_view counts doubled after setup?
Reports show wrong timezone/currency, how to fix?
Site search isn’t tracked, what did I miss?
Internal traffic is inflating data. How to exclude?